ReyOS
A calm, dependable KDE desktop built to give older computers a second life.
Install it, use it, update it, and recover it — without fear.
A calm, dependable KDE desktop built to give older computers a second life.
Install it, use it, update it, and recover it — without fear.
Features
These ship with ReyOS by default — no extra installs, no separate accounts.
One settings app instead of a dozen. Updates (atomic, read-only check first, with a pre-update Timeshift snapshot taken automatically), a Backup Center, a unified Security page (firewall, bring-your-own WireGuard VPN, Shields, permissions, opt-in USB device protection), CVE-tracked security updates, one-click NVIDIA driver install, network/Wi-Fi/sound/users, guarded permission repair, and live power & performance tuning — including zram, systemd-oomd protection, and adaptive preload for faster everyday responsiveness and boot-time follow-through — organized as Home, Essentials, and Advanced.
A Midnight Copper terminal menu (reyos-tools) for the stuff you'd otherwise have to Google: safe package updates, firewall rules, CPU/swap tuning, zram and swappiness controls, home-only permission fixes, and network & disk info.
ReyOS Browser is private by default — session-only, no history, no accounts — with ad/tracker Shields on out of the box, a maintained filter list you can refresh anytime, and a reader mode for cleaner articles. More on the browser ↓
ReyOS Reader is a native EPUB, PDF, and comic-book (CBZ/CBR) reader with a Kindle-style layout — for your books and manga without needing a browser tab or a third-party app.
Screenshots
Real captures from a fresh ReyOS-Test install — no mockups, no staged renders.
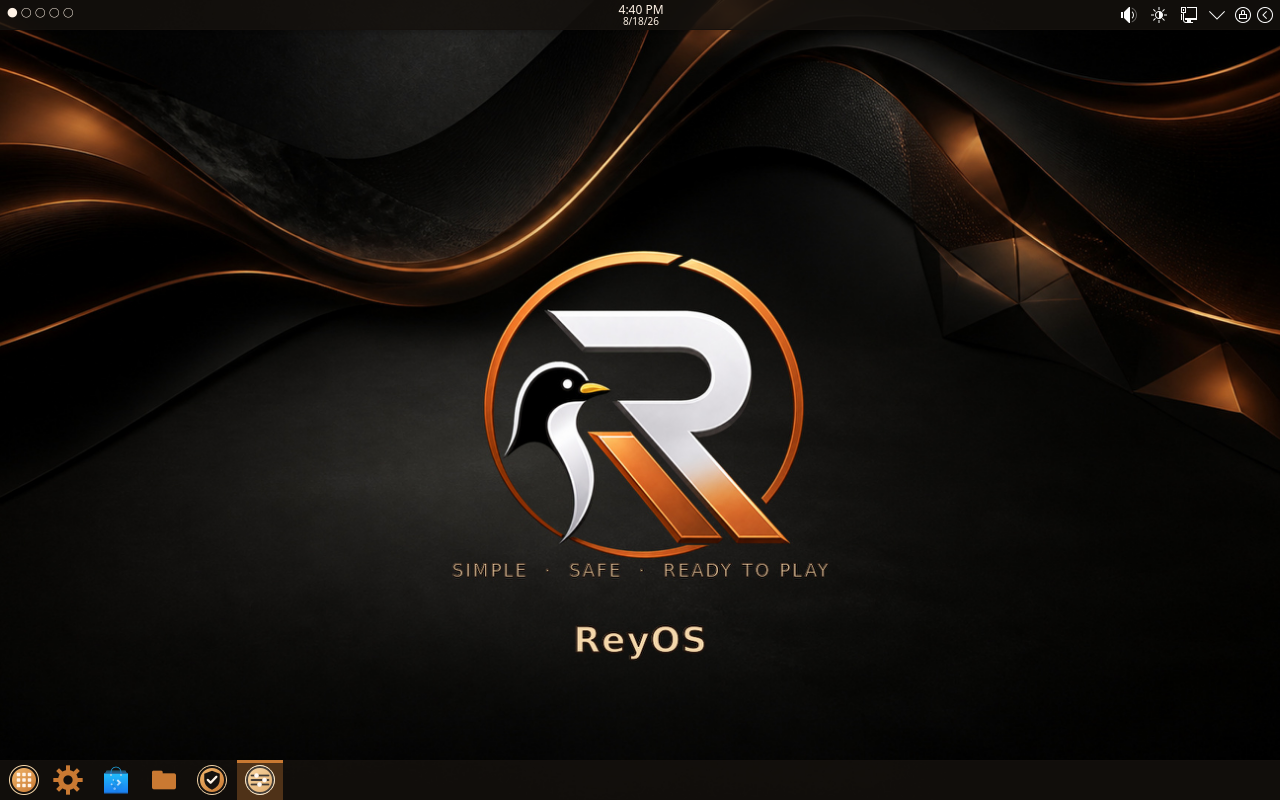
The desktop — KDE Plasma, Midnight Copper theme.
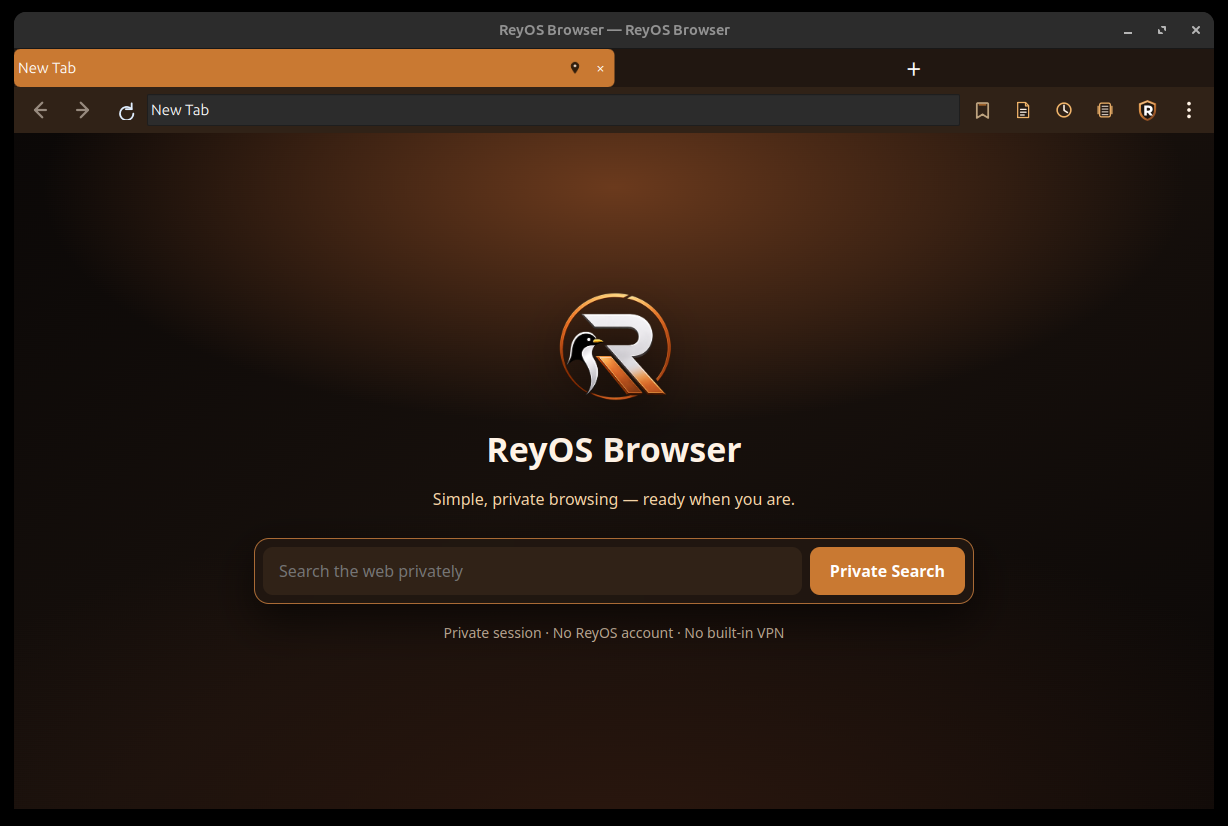
ReyOS Browser — private by default, captured as a live app window.
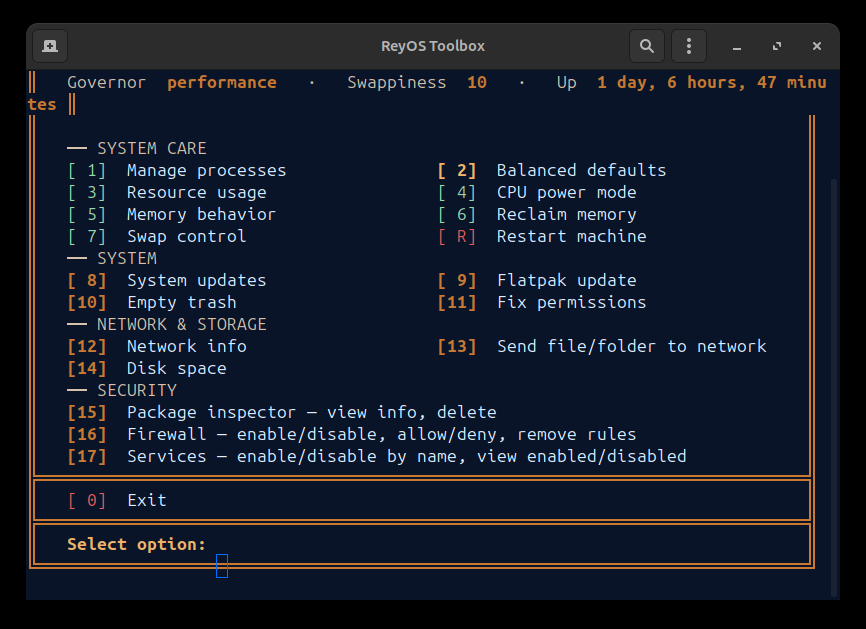
ReyOS Toolbox — the Midnight Copper terminal menu for system maintenance.
Status
ReyOS is being built and validated in the open, one fresh install at a time. Here's the honest state of things right now — nothing here is marketing gloss.
Download
Published as a GitHub Release with SHA-256 checksums. The ISO (3.1GB) is split into two parts to fit GitHub's per-file size limit — download both and join them before use (steps below). Source is already public if you want to follow along.
x86_64, KDE Plasma, Calamares installer, Midnight Copper theme. Includes ReyOS Connect for the first time.
Download Part 1 (1.6GB) Download Part 2 (1.4GB)Release notes on GitHub · See how installing works ↓
After downloading both parts, join them into one file:
Linux / macOS:
cat reyos-2026.09.03-x86_64.iso.part1 reyos-2026.09.03-x86_64.iso.part2 > reyos-2026.09.03-x86_64.isoWindows (Command Prompt):
copy /b reyos-2026.09.03-x86_64.iso.part1+reyos-2026.09.03-x86_64.iso.part2 reyos-2026.09.03-x86_64.isoPackage sources, ISO build profile, and Calamares config — all public on GitHub.
View on GitHubInstall Guide
Same steps as installing any Linux distro from a USB drive — the one extra step here is joining the two downloaded parts back into a single ISO first.
Download reyos-2026.09.03-x86_64.iso.part1 and .part2 from the GitHub Release, then join them (Linux/macOS):
cat reyos-2026.09.03-x86_64.iso.part1 reyos-2026.09.03-x86_64.iso.part2 > reyos-2026.09.03-x86_64.isoOn Windows (Command Prompt):
copy /b reyos-2026.09.03-x86_64.iso.part1+reyos-2026.09.03-x86_64.iso.part2 reyos-2026.09.03-x86_64.isoThen confirm the joined file wasn't corrupted:
sha256sum reyos-2026.09.03-x86_64.isoCompare the result against 398b1cf09a0403c9304c6153d0334131f927221201ead81e3c23af9204dd7938 (also published with the release).
On Linux, find your USB device first with lsblk — getting the device wrong will erase the wrong disk — then write the ISO directly to it:
sudo dd if=reyos-2026.09.03-x86_64.iso of=/dev/sdX bs=4M status=progress oflag=syncReplace /dev/sdX with your actual USB device, not a partition like /dev/sdX1. Prefer a GUI? balenaEtcher or Ventoy work the same way on Linux, Windows, or macOS.
Restart the target machine and open its boot menu — commonly F12, F10, Esc, or Del depending on the motherboard — and select the USB drive. ReyOS boots straight to a live desktop; nothing on the machine's disk is touched yet, so it's safe to just look around first.
The Calamares installer opens automatically on the live desktop. Pick your language and keyboard layout, choose a disk (Erase Disk is the simplest option for a clean install), and create your user account.
Once the installer shows "All done.", remove the USB drive and reboot. First login lands on ReyOS Welcome to finish setup — pick software, and you're in.
This is the same install flow that's been run and verified on real test hardware for every build — a real Calamares install completing and booting into ReyOS was confirmed again on this exact ISO.
ReyOS Browser
The browser built into ReyOS runs a private, session-only profile with no persistent history — Shields blocks ads/trackers, upgrades HTTP to HTTPS, strips tracking parameters from links, and randomizes your canvas/WebGL/audio fingerprint per site, all backed by a filter list you can refresh anytime. Plus a reader mode for cleaner articles, a KWallet-backed password manager, bookmark folders, and its own download manager. No extensions or accounts required.
utm_*, fbclid, gclid, and similar link-tracking params are removed from navigations.Included by default on ReyOS. On Arch-based distros you build the package directly from the ReyOS source tree, not from the AUR; Ubuntu and Debian users can grab a ready-made .deb — see below.
A Windows build is in development and not yet available.
In DevelopmentRun ReyOS Browser outside ReyOS
The browser itself is cross-distro Qt/PySide code. On Arch-based systems, build the package directly from the ReyOS repo — not from the AUR. On Ubuntu or Debian, grab the ready-made .deb below.
Arch-based distros
It's a real package with no ReyOS-specific runtime dependencies. This is not an AUR install: pyside6, qt6-webengine, qt6-webchannel, kirigami, libnotify, kdialog, and python-secretstorage are all in the official Arch Linux repos, so makepkg handles everything:
git clone https://github.com/Reypaulino/ReyOS.git
cd ReyOS/reyos-packages/reyos-browser
makepkg -si
Then launch it with reyos-browser. Works on Arch, CachyOS, Manjaro, EndeavourOS, or anything else built on pacman.
Ubuntu / Debian
A ready-made amd64 .deb is available on GitHub Releases. It bundles its own Python runtime (PySide6 + Qt WebEngine); apt pulls in the handful of system libraries QtWebEngine needs automatically:
cd /tmp
wget https://github.com/Reypaulino/ReyOS/releases/download/reyos-browser-v0.1.0-97ubuntu1/reyos-browser_0.1.0-97ubuntu1_amd64.deb
sudo apt install ./reyos-browser_0.1.0-97ubuntu1_amd64.deb
Then launch it from your app menu, or run reyos-browser.
ReyOS WSL
A lightweight Arch/ReyOS terminal environment for Windows Subsystem for Linux 2 — ReyOS development, package building, dependency/script testing, and general dev tooling from a Windows machine, no VM required. It does not replace the ReyOS desktop ISO: no KDE Plasma, no installer, no bootloader, no hardware drivers — WSL2 supplies its own kernel and there's no desktop session to boot into.
pacstrap run on the ReyOS Dev VM — three real bugs were found and fixed that way, not by guessing. It has not yet been installed on a real Windows 11 + WSL2 machine, so treat the Windows-side steps below as untested until someone actually runs them.
x86_64, no kernel/bootloader/desktop bundled — Minimal profile by default, with Developer and ReyOS Developer profiles offered at first run.
Download ReyOS-WSL-x86_64.wslwsl --import fails with something like HCS_E_SERVICE_NOT_AVAILABLE, run wsl --install --no-distribution as admin, restart, and confirm Task Manager → Performance → CPU shows "Virtualization: Enabled" (a BIOS/UEFI setting if not — Windows can't turn this on for you).
Grab ReyOS-WSL-2026.09.02-x86_64.wsl and its checksum from the GitHub Release above, then confirm it (PowerShell):
Get-FileHash .\ReyOS-WSL-2026.09.02-x86_64.wsl -Algorithm SHA256Compare against the published .sha256 file.
Use wsl --import, not wsl --install --from-file — real-tested on Windows 11, --from-file fails with error_file_not_found against this artifact (it targets Microsoft's newer packaged .wsl format, not a plain rootfs tarball). --import takes three separate things: a distro name, a new empty folder for WSL's own use, and the file you actually downloaded — point that last one at wherever it landed (Downloads, here):
wsl --import ReyOS $env:LOCALAPPDATA\ReyOS-WSL $env:USERPROFILE\Downloads\ReyOS-WSL-2026.09.02-x86_64.wsl
wsl -d ReyOSA setup wizard runs automatically on first login: pick a username and password, then choose Minimal, Developer (git, Python, Node.js, base-devel), or ReyOS Developer (adds the tools needed to actually build reyos-* packages — cmake, meson, ninja, Qt6 dev libs, and more).
WSL only picks up your new default user after a restart:
wsl -t ReyOS
wsl -d ReyOS
You're now in a ReyOS shell as your own user, with sudo and the ReyOS/CachyOS/Arch package repos configured.
Selected ReyOS GUI apps (like ReyOS Browser or ReyOS Reader) can launch through WSLg where your WSL/Windows version supports it — this hasn't been confirmed on real hardware yet. KDE Connect device pairing, Bluetooth, and hardware-dependent Control Center pages are not expected to work under WSL and aren't something this build tries to fake.
Build and run a real reyos-* package (e.g. ReyOS Browser)
First check whether GUI forwarding (WSLg) is actually available on this WSL/Windows version:
echo $WAYLAND_DISPLAY $DISPLAYIf both come back empty, there's no GUI forwarding here — CLI/build testing below still works fine, a window just won't appear. Either way, get the source and build:
git clone https://github.com/Reypaulino/ReyOS.git
cd ReyOS/reyos-packages/reyos-browser
reyos-dev-test . --install --run reyos-browser
reyos-dev-test (built into the image) lints the PKGBUILD, runs a real makepkg -sf — pulling pyside6, qt6-webengine, qt6-webchannel, kirigami, and the rest straight from the official repos, no AUR — installs the result, then launches it if a real $WAYLAND_DISPLAY was found. Swap in any other reyos-packages/<name> directory to build something else.